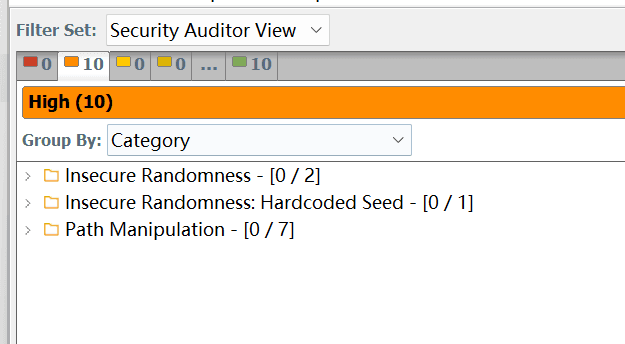
Recently, I received a task to perform code scanning on Python code. I had previously only used Fortify to scan Java class code. After searching for tools that support scanning Python class code, I found that the process is different from the conventional method, so I will document the process.
1. Preparation#
- Fortify Static Code Analyzer (SCA): Windows version 232.2.
- Install VS Code
- Install Fortify VSC Plugin:
- Open VS Code.
- Go to the Extensions view (shortcut
Ctrl+Shift+X). - Search for "Fortify" and find and install the "Fortify VSC" plugin.

2. Fortify VSC Plugin Configuration#
In VS Code, open the Fortify plugin interface (usually found on the left activity bar with the Fortify icon). It should display as follows.
You can ignore the first part and directly switch to the Static Code Analyzer executable path view.

2.1 Configure SCA Executable Path#

- Field:
Static Code Analyzer executable path - Description: Specify the path of
sourceanalyzer.exe. - Settings:
- Recommended: If you have added the
bindirectory of Fortify SCA to the system environment variablePath, you can simply entersourceanalyzerhere.
- Recommended: If you have added the

- **Alternative:** If the above method does not work, click the `Browse...` button on the right, navigate to the Fortify SCA installation directory, find the `bin` folder, and then select `sourceanalyzer.exe`.
    * **Example Path:** `C:\Program Files\Fortify\Fortify_SCA_and_Apps_<version>\bin\sourceanalyzer.exe`
The configuration is basically done. You just need to open the directory that needs to be scanned in VS Code, and then click the Fortify plugin button to auto-fill.
2.2 Configure Build ID#
- Field:
Build ID - Description: Set a unique identifier for this scanning task.
2.3 Configure Scan Results Output Path (FPR)#
- Field:
Scan results location (FPR) - Description: Specify the save path and filename for the scan result file (
.fprfile). Fortify Audit Workbench will use this file. By default, this file is saved in the root directory of the code repository.
2.4 Configure Log Path#
- Field:
Log location - Description: Path for the log file of the SCA scan.
- Settings: Usually, you can keep the default. You can click the
Openbutton on the right to view the logs.
2.5 Configure Options (Python Specific)#
- Field:
Add translation options - Description: For Python code, you need to specify the Python version and dependency library path here.
- Settings:
- Check the
Add translation optionscheckbox. - In the text box that appears after checking, enter the following parameters. Please adjust the paths according to your Python environment.
- First, obtain the Python module search path by running
python3 -c "import sys; print(sys.path)"in the command line. Here is my output:
- First, obtain the Python module search path by running
- Check the
['', 'D:\\Scoop\\apps\\python311\\current\\python311.zip', 'D:\\Scoop\\apps\\python311\\current\\DLLs', 'D:\\Scoop\\apps\\python311\\current\\Lib', 'D:\\Scoop\\apps\\python311\\current', 'D:\\Scoop\\apps\\python311\\current\\Lib\\site-packages', 'D:\\Scoop\\apps\\python311\\current\\Lib\\site-packages\\win32', 'D:\\Scoop\\apps\\python311\\current\\Lib\\site-packages\\win32\\lib', 'D:\\Scoop\\apps\\python311\\current\\Lib\\site-packages\\Pythonwin']
* Therefore, you should enter in the Fortify plugin:
-python-version 3 -python-path "D:\Scoop\apps\python311\current\DLLs;D:\Scoop\apps\python311\current\Lib;D:\Scoop\apps\python311\current\Lib\site-packages"
        + `-python-version 3`: Specify the Python version as 3.
        + `-python-path "..."`: List the paths where Python looks for standard libraries and third-party libraries, separated by semicolons `;`. These paths come from the output of your `sys.path`.
2.6 Other Options (Optional)#
Add scan options: Used to add additional parameters for the SCA scanning phase, generally keep the default.Update security content: Use the latest vulnerability detection rules.
3. Execute Scan#
- After completing all the above configurations, click the
Scanbutton at the bottom of the Fortify VSC plugin interface. - The scanning process will run in the background. You can check the scanning progress and detailed logs in the
OUTPUTpanel or terminal of VS Code.
5. View Scan Results#
- After the scan is complete, a
.fprfile (e.g.,python_results.fpr) will be generated at the path specified inScan results location (FPR). - Open the Fortify Audit Workbench client application.
- Click "File" -> "Open Project", and then select the generated
.fprfile. - In the Audit Workbench, you can view the security vulnerabilities detected, their types, severity, affected lines of code, data flow analysis, and remediation suggestions in detail.
